
✏️ This article was written and sponsored by our friends at Jukebox—the global printing company that’s leading the way for creatives.
In the world of sticker production, there’s no other type of sticker more versatile, designer-friendly, and inspiring than a sticker sheet. Ticking all the boxes when it comes to custom stickers, sticker sheets are diverse in shape and size, having no limitation to the creative process and outcome. It is an excellent alternative to individual custom stickers and an awesome way of getting multiple designs or a design theme in one place, on one sticker sheet.
Over the years, we at Jukebox have seen sticker sheets in many designs, shapes, and sizes — with the most popular being 8.5 x 5.5 size. From packaging to brand awareness, sticker sheets can be used in various ways, specifically for business. No matter the brand or brief, sticker sheets provide a powerful marketing asset that transcends all demographic characteristics, including age, educational background, and gender.
As a designer, using this unique medium to communicate a brand’s message gives you an edge over others. It allows for diversity in your skillset, and that’s why we at Jukebox have created this step-by-step guide to making sticker sheets. Using Adobe Illustrator, the six-step process will give you everything you need to create a sticker sheet. You’re welcome.
Ready to learn how to make your own sticker sheets? Here is how to create a sticker sheet in Adobe Illustrator.
Step 1: Set Up Your File

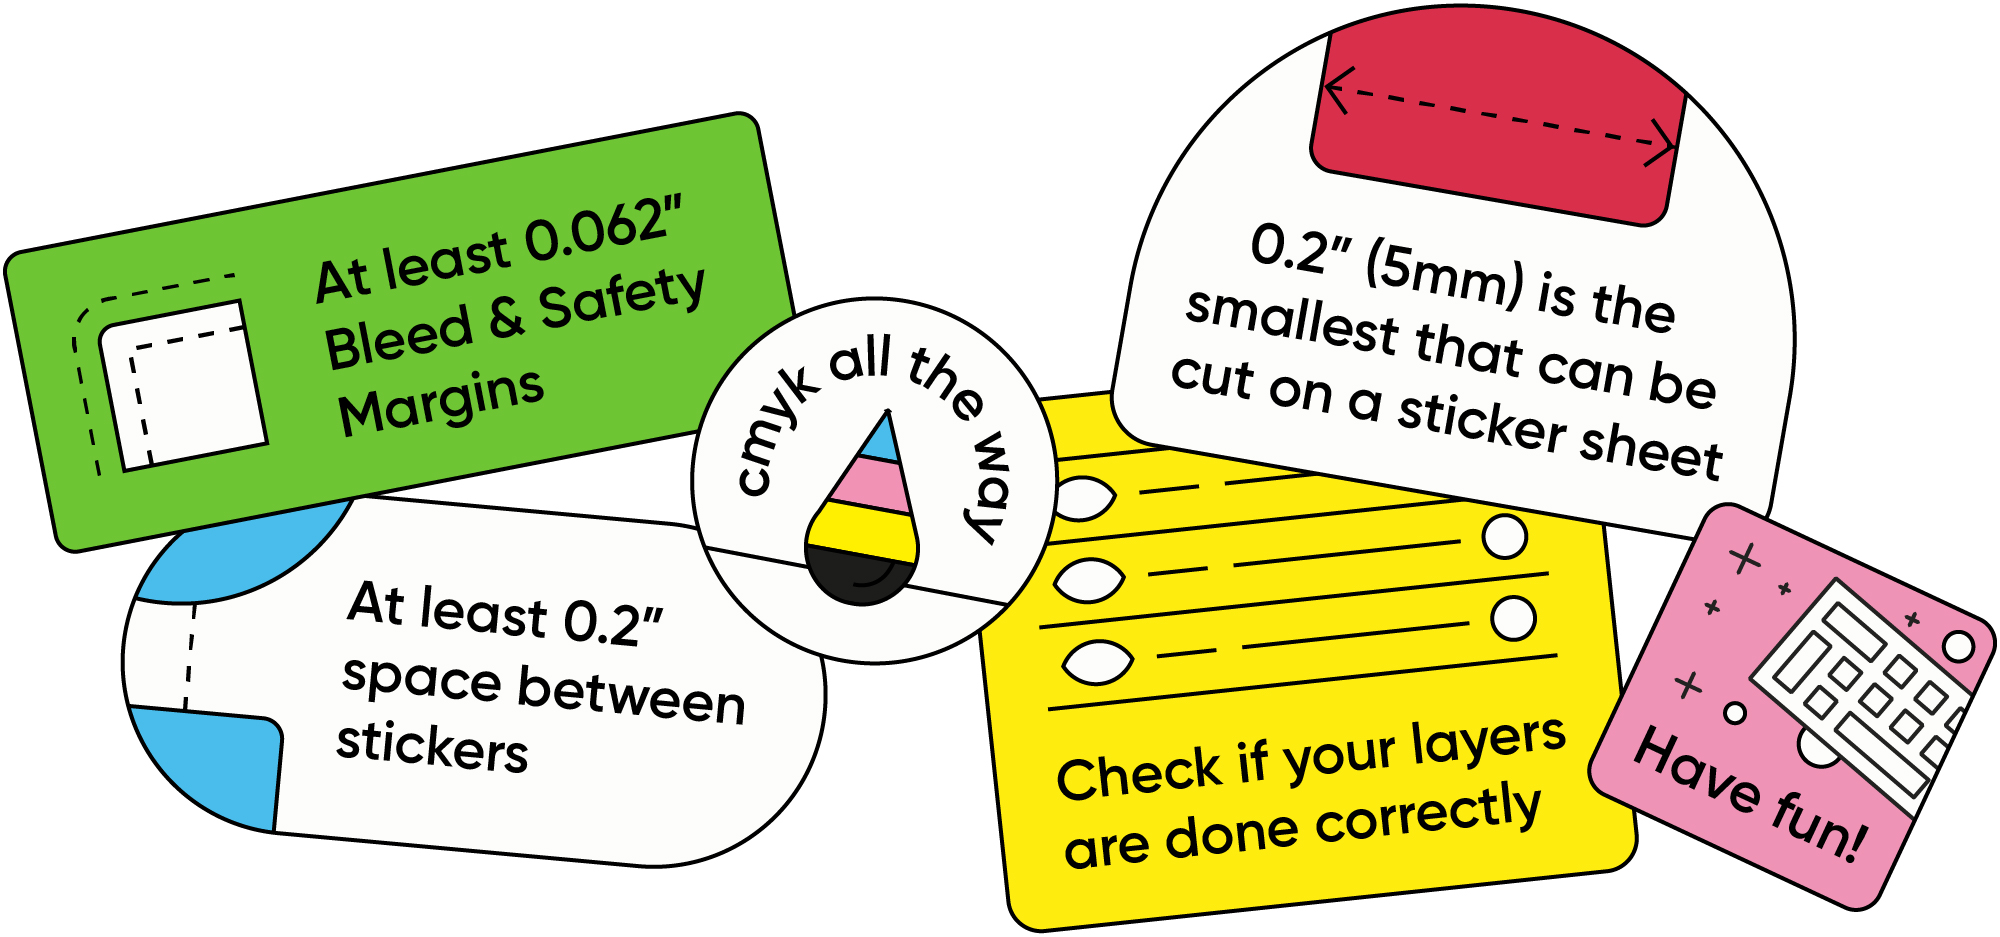
Create a new document with your desired size (we used 5.7” x 8.7”), make sure the Color Mode is selected to CMYK and the resolution to 300 PPI. Set the Bleed Size at 0.0625 inches.
Step 2: Set Up the Artwork and Thru-Cut Layer

Place a rectangle with your background color until the red guides (Bleed) and name this layer ‘Artwork.’ Then, add a new layer on top and name it ’Thru-Cut’.
With the ’Thru-Cut’ layer selected, go to ‘Rounded Rectangle’ in your left menu panel and double-click on your artboard. Set the size to 8.5 x 5.5 inches, the Corner Radius to 0.25 inches, and click ‘OK.’
Remove the fill, give it a 0.25pt white stroke and make sure the stroke is set to ‘Align Stroke To Center’ in your Stroke Panel. When you’re done, lock this layer and head back to the ‘Artwork’ layer.
Step 3: Create the Easy Peel

Paste your artwork in the ‘Artwork’ layer.

Copy your artwork (⌘+C) and expand your artwork by going to Object > Expand. Go to your Pathfinder panel and select ‘Unite’ to flatten all elements and create a solid shape.

Remove the fill of the shape and add a 100% Magenta (C=0, M=100, Y=0, K=0) stroke with a minimum width of 0.25pt.

Go to Object > Path > Offset Path. Set the ‘Offset’ to 0.1 inches (minimum) and the ‘Joins’ on Round as shown on the image above.
Click ‘OK’ and delete the inner stroke.
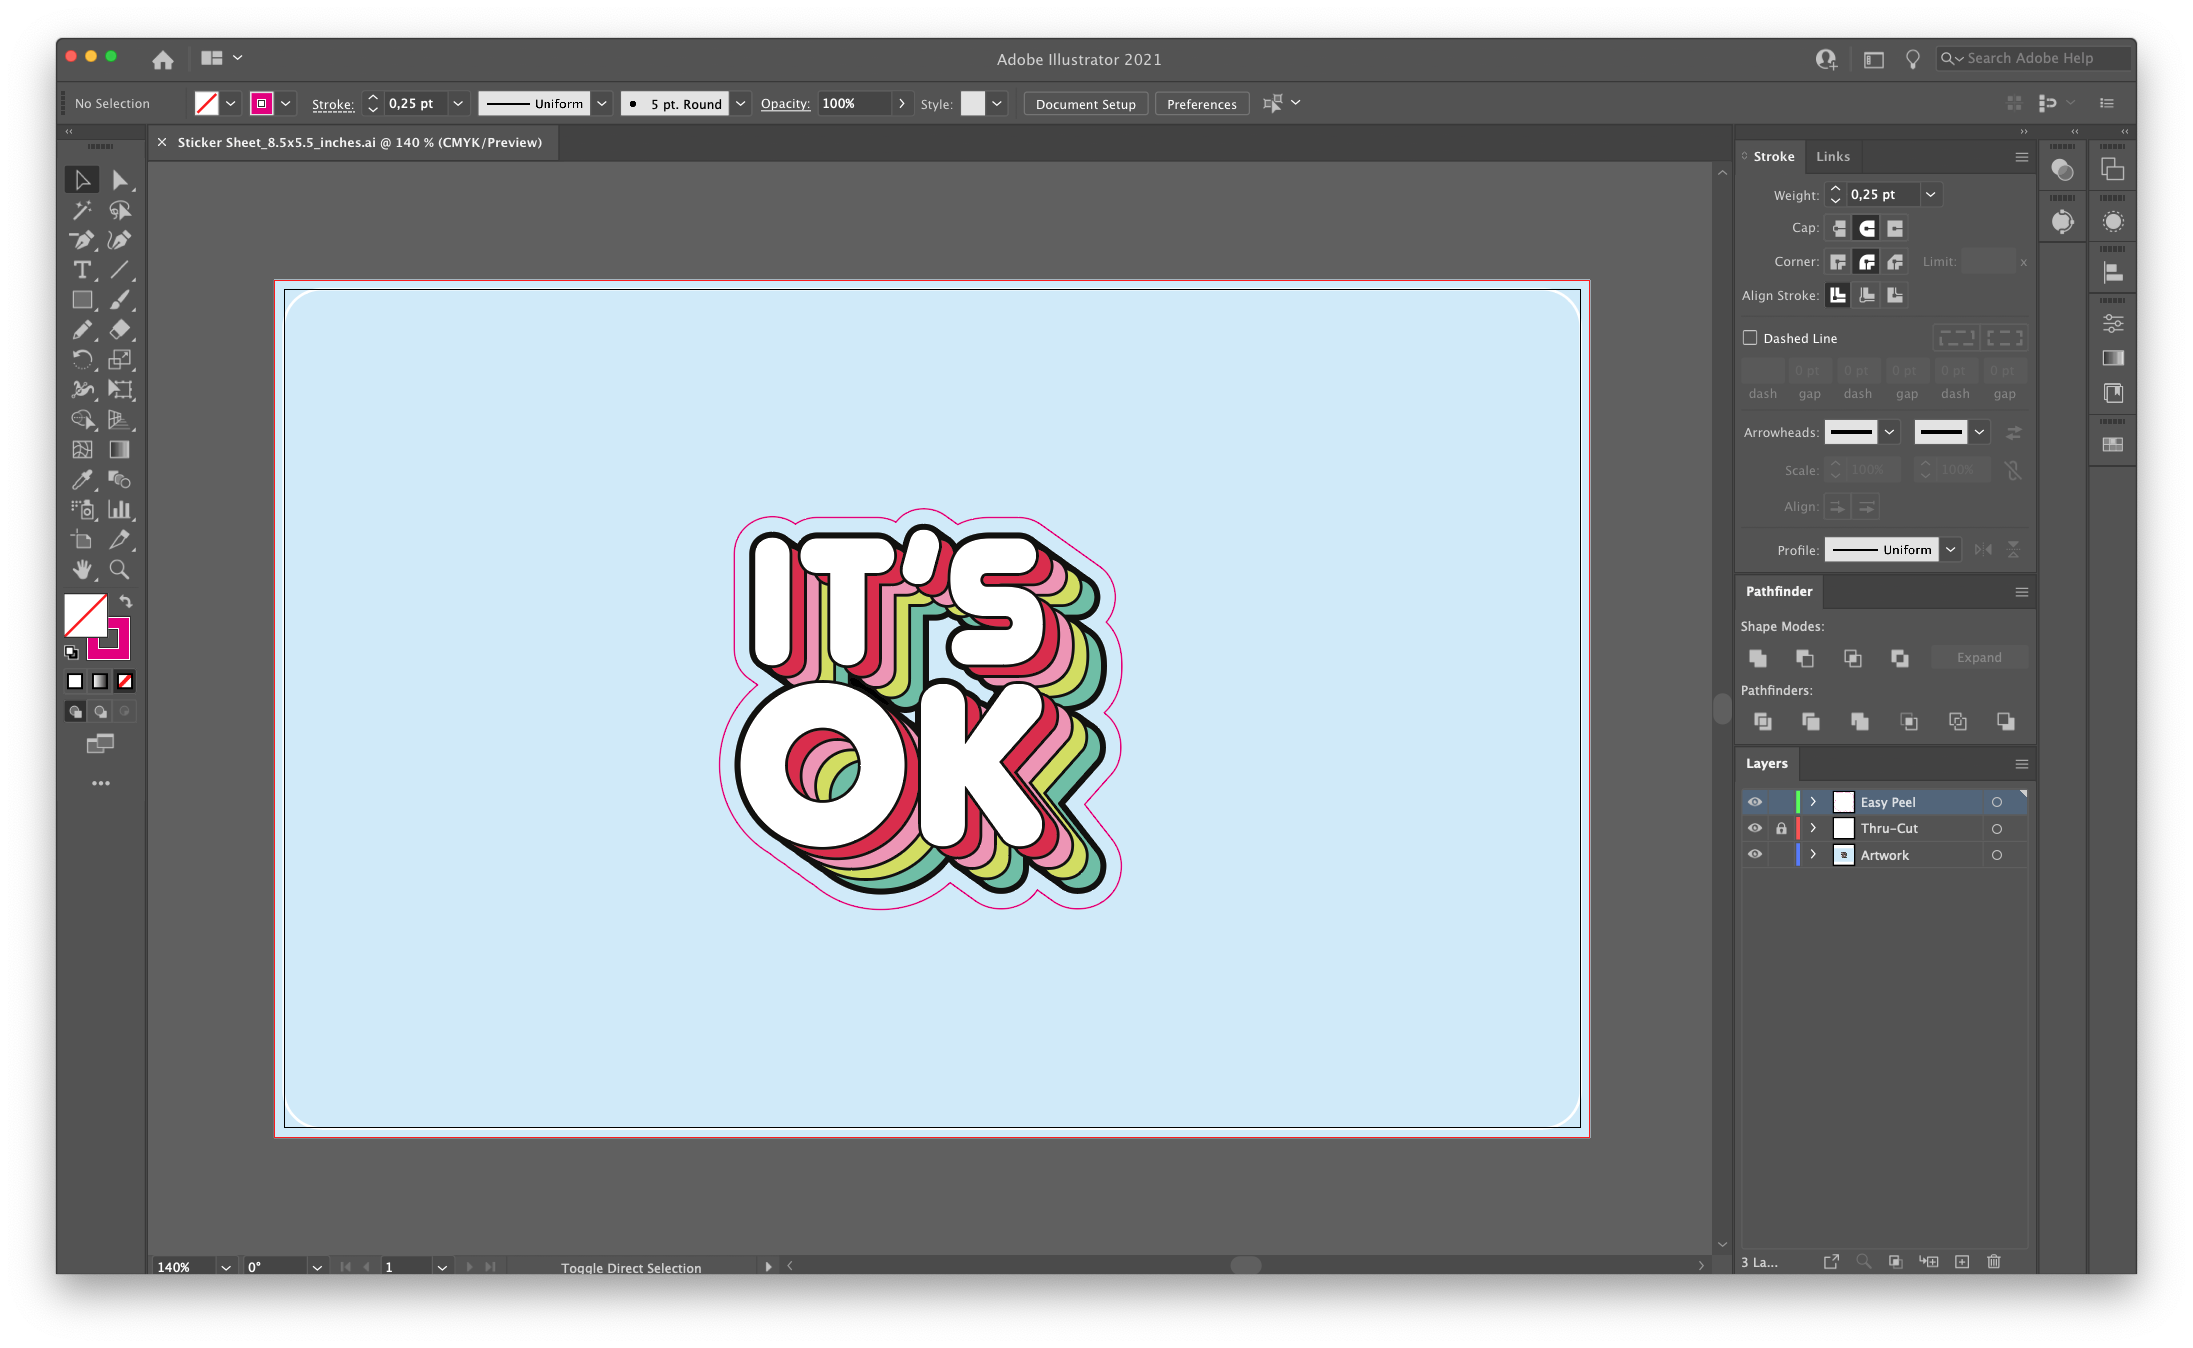
Place back the artwork that you’ve copied earlier with ‘Paste in Front’ (⌘+F). Create a new top layer named ‘Easy Peel’ and place the magenta stroke in it.
Hooray, you’ve made an Easy Peel!
Step 4: Place All Stickers

Repeat the same process for each sticker you want to add to your sheet. Make sure everything is in the correct layer, as mentioned above. The stickers should be at least 0.2 inches away from each other and make sure that any important elements are at least 0.2 inches away from the Thru-cut lines to avoid any issues.
Step 5: Add Extra Elements

Add some extra elements between the stickers in the ‘Artwork’ layer to make it look even cooler. You could also add your business information or other messaging so it becomes a real marketing asset that sticks (pun intended).
Step 6: Exporting Your Sheet as a PDF
Before you start exporting, make sure you’ve set the color mode to CMYK. Go to File > Document Color Mode > and select ‘CMYK.’ Not sure how to properly work with these different color modes? We made an article about this.

- Go to ‘Save a Copy’ (⌥+⌘+S) and set the format to ‘PDF’.
- Keep the Adobe PDF Preset to ‘Illustrator Default’.

- In the ‘Marks and Bleeds’ panel, check the ‘Use Document Bleed Settings’ box to select the 0.0625” bleed area we’ve added while setting up the document.
- Click on ‘Save PDF.’
That’s it!
Key takeaways for creating sticker sheets:
No matter your design style or clients you’re serving, sticker sheets can provide you with versatility and a new way of doing things. Love what you see and want to create and print your own sticker sheets? Jukebox can make love to make that happen. ■
Jukebox is a global print company that strives to provide creatives with print solutions made for them. Providing people around the world with high-quality, long-lasting print products and services at affordable prices.
Find more Process stories on our blog Courtside. Have a suggestion? Contact stories@dribbble.com.


